
Separate permanent progress from one run
| Where you are | Do this next | Why |
|---|---|---|
| Before Fight | Inspect the character, starting weapon, runes and available permanent upgrades. | Know which part of the next build is already unlocked. |
| During a run | Collect experience, dodge dangerous areas and take upgrades that help your actual skills. | A random collection of effects is harder to improve coherently. |
| After a run | Spend resources on relevant permanent growth and review weapon options. | A failed attempt can still expand the next attempt’s options. |
The official game distinguishes characters, weapons and a skill tree; the 2025 beginner source recommends combining permanent growth with focused skill choices. We turn those systems into this order, rather than prescribing an unverified fastest unlock route.[2][1]
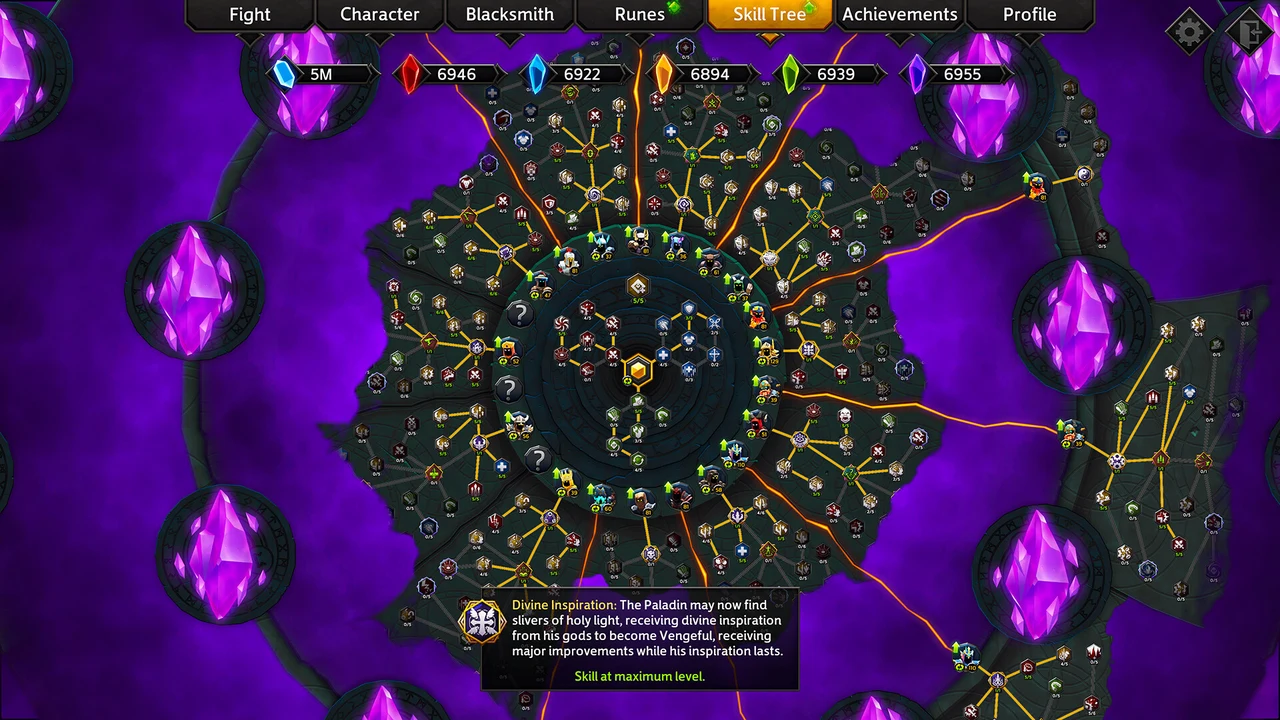
What to inspect before spending
- Open the global Skill Tree and read affordable nodes that solve a present problem. Distinguish account-wide effects from a particular character’s progression.
- Check the weapon screen for requirements and materials. A weapon is useful when its skill and bonuses fit the route you want to try, not merely because it is new.
- Review the runes you actually own. Copying a guide that depends on a locked rune can hide the reason its skills work.
- Keep enough information to compare runs: character, weapon, mode, Curse setting and the main skill.
The official skill-tree screenshot documents the interface, not a recommended node path. Its displayed counts and values are promotional-state data; use your own game’s text.[3]
Pick a first-clear goal
Aim to finish a run with a damage core you can describe. Start on a difficulty where you can learn enemy warning areas and keep a route through the crowd. When you repeatedly reach the same boss safely, increase one challenge at a time. If you keep dying before the build forms, permanent upgrades and a simpler setup are more useful than copying a late-game damage record.
For skill-slot decisions, use the build checklist. For the Frozen Wastelands circles, use the separate Bumble route; that is a hidden-task procedure, not a requirement for every normal clear.
At the portals: choose by your next task
Read each portal label and decide whether you are banking progress or continuing into a mode with different demands. Choose a normal return when your purpose is spending materials or changing equipment. Choose a continuation when your current setup is stable and that mode advances the unlock you need. We do not attach a universal time threshold to all versions or modes.
The 2025 beginner recommendations are useful context, but their character preferences are not a current strength ranking. The right next step depends on your unlocks and the task you are completing.[1]
Sources & verification
- Pro Game Guides · Nebojša Prijić ↗ (opens in a new tab) — 20 June 2025 beginner guide; recommendations are third-party advice.
- Steam · Game Smithing ↗ (opens in a new tab) — Store checked 2 November 2026; product facts, not a build benchmark.
- Game Smithing · Official game website ↗ (opens in a new tab) — Official screenshots and platform links; image capture build not supplied.